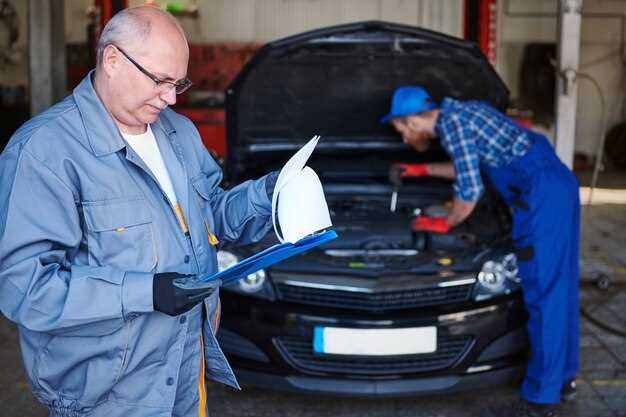
When it comes to classic vehicles, the integrity of repairs made after an accident is paramount. Such iconic cars often hold not just monetary value but also emotional significance for their owners. Therefore, ensuring that any repair work adheres to quality standards is essential for preserving both the vehicle’s performance and its historical essence.
A thorough visual inspection can reveal much about the quality of repairs undertaken. Look for inconsistencies in paint color, misalignments in body panels, and the presence of overspray, which could indicate rushed or subpar work. Engaging in this scrutiny not only helps in assessing the current state of the vehicle but also allows a potential buyer to gauge the level of care that previous owners invested in maintaining its condition.
Moreover, understanding the specific techniques used in restoration and repair is crucial. This knowledge empowers classic car enthusiasts to recognize if modern materials and methods were improperly applied, potentially compromising the vehicle’s authenticity. By prioritizing an informed inspection process, owners and restorers alike can ensure that classic vehicles remain as remarkable as the day they first rolled off the assembly line.
Assessing Repair Quality: Key Indicators to Examine

When evaluating the quality of repairs on classic vehicles, a thorough inspection is essential. This process involves several key indicators that can help determine whether the repairs were conducted to a high standard. One of the primary aspects to consider is the visual alignment of body panels. Gaps between doors, hoods, and fenders should be uniform; irregularities may indicate improper installation or repairs.
Another crucial factor is the paint finish. A high-quality repair will have a smooth, even paint application that matches the original color and texture of the vehicle. Check for any signs of overspray or uneven coating, which can be telltale signs of poor quality work. The depth of the paint can also indicate whether the proper techniques were used during refinishing.
Examine the welds and seams where panels have been joined. Quality repairs should feature clean welds that are consistent in appearance and strength. Jagged or uneven welds may not only compromise structural integrity but also reflect a lack of attention to detail in the repair process.
Don’t overlook the undercarriage during your inspection. Signs of rust or inadequate coating can suggest that repairs were not done thoroughly. A well-repaired vehicle will have a properly treated undercarriage that is free from corrosion and protective coatings where required.
Finally, it’s important to assess the functionality of parts that were repaired or replaced. Check that doors open and close smoothly, and that mechanical components, like the engine and transmission, are operating properly without unusual noises or leaks. Each of these indicators plays a vital role in ensuring that the repairs meet the quality expected for classic vehicles.
Conducting a Thorough Visual Inspection: Step-by-Step Process

Performing a visual inspection is crucial in verifying the quality of repairs done on classic vehicles. This process allows you to identify any inconsistencies or issues that may affect the vehicle’s authenticity and performance. Here is a detailed step-by-step guide on how to conduct an effective visual inspection.
Step 1: Gather Necessary Tools
Before starting the inspection, collect essential tools such as a flashlight, magnifying glass, and a notepad for recording findings. These tools will help ensure a comprehensive review of the vehicle’s condition.
Step 2: Start with an Exterior Examination
Begin by examining the vehicle’s exterior for signs of repair. Look for mismatched paint colors, indicating bodywork has been done. Pay attention to gaps between panels, as uneven spacing can reveal poor repair quality.
Step 3: Inspect Under the Hood
Open the hood and inspect the engine bay. Look for any signs of replaced parts or fresh paint that may suggest a repair. Check for signs of leaks, as they could indicate issues with the repairs made to the engine or related systems.
Step 4: Check the Undercarriage
Examine the undercarriage thoroughly. Use your flashlight to spot any rust, corrosion, or welding marks that could signify previous damage. Ensure that all components are securely fastened and free of any signs of repair that could affect safety.
Step 5: Review the Interior
Next, inspect the interior for signs of wear or repairs. Look for replaced upholstery, which might indicate past damage. Check the dashboard, door panels, and any controls to make sure they function properly and are consistent with the vehicle’s original design.
Step 6: Document Findings
As you conduct the inspection, make thorough notes of your observations. Document any areas of concern that may require further evaluation by a professional. This step is vital for ensuring transparency in the repair assessment process.
Step 7: Seek Expert Opinions
If you encounter significant concerns during your visual inspection, consider consulting with a classic car expert. They can provide additional insights and verify the quality of the repairs with more specialized knowledge.
By following these steps, you will be equipped to conduct a thorough visual inspection that effectively assesses the quality of repairs on classic vehicles. This process not only enhances your understanding but also protects your investment in timeless automobiles.
Documenting Repairs: Importance of Records and Evidence
Documenting repairs on classic vehicles is crucial for ensuring the integrity and authenticity of the vehicle over time. Proper records provide a clear history of repairs and maintenance, which is especially important for collectors and enthusiasts. Here are key reasons why maintaining thorough documentation is essential:
- Verification of Repairs: Accurate records serve as proof that repairs have been conducted by qualified professionals. This includes invoices, receipts, and service agreements that detail the nature of the work performed.
- Maintenance History: A comprehensive repair log allows current and future owners to track the vehicle’s maintenance over the years, helping to identify patterns or recurring issues that may require attention.
- Value Preservation: When it comes to selling the vehicle, a well-documented repair history can significantly enhance its market value. Potential buyers are likely to pay a premium for vehicles with verified maintenance records.
- Legal Protection: In the event of disputes regarding the condition or value of the vehicle, having documented evidence of all repairs can provide legal protection and clarity.
When documenting repairs, consider the following elements to ensure comprehensive records:
- Detailed Descriptions: Include a clear description of each repair performed, specifying parts replaced or refurbished and the methodologies applied during the process.
- Visual Evidence: Supplement written records with photographs taken before, during, and after the repair process. This visual documentation can serve as compelling evidence of the work accomplished.
- Inspection Reports: If applicable, include inspection reports that validate the quality and safety of the repairs, signed off by recognized experts in the field.
- Dates and Mileage: Keep records of the dates when repairs were completed and the vehicle’s mileage at that time. This information helps establish a timeline for maintenance activities.
In conclusion, thorough documentation is an integral part of maintaining the value and integrity of classic vehicles. Focusing on detailed records ensures that all repair work is recognized, verified, and preserved for the vehicle’s future journey.


